
An iPhone is a prized possession of any individual who carries one. These phones from Apple, have managed to capture the market of cell phone technology from the very moment it has stepped in. With a variety of mouthwatering features and high software and hardware support, an iPhone is just the gadget which one would look for in today’s advanced society. These phones have a wide range of capabilities in terms of supporting features. In terms of display quality, battery backup, multimedia technologies, corporate features and many more; these have become the ultimate all-in-one kind of mobile devices.

Now, even the best has its share of drawbacks. Similarly, an iPhone has very minute lines of exceptions. Since these phones are always prepared well to serve the elite desires of individuals, they are highly sensitive to even the minimum amounts of tampering and mishandling. This type of mishap might occur with you too. A very common and prone accident with your iPhone is that its screen might get cracked. At this point, your only way out is to get a screen replacement for your phone. There are a few methodologies about how you could treat your phone.
Steps To Repair Your iPhone Screen
Step 1:
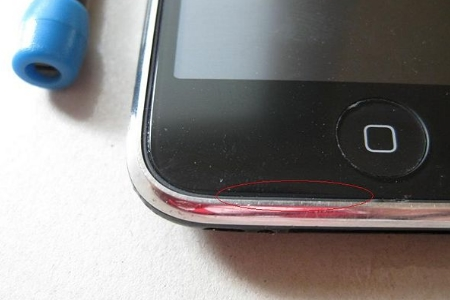
At first look for the two screws present on the lower side of your phone. These can be found at the bottom half where you see the HOME button.

Now use a screwdriver that fits into these screws and unscrew the thing.
Step 2:
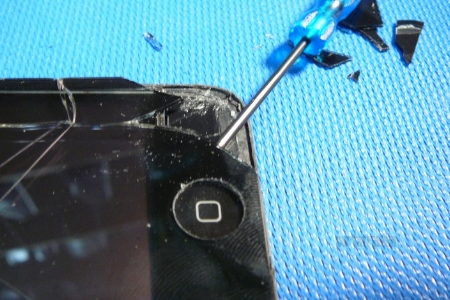
Now you need to do away with the screen of your phone. This can be done by any of the following methods. These methods will just help you get your screen lifted from the case. Do not pull it right out of the case just now 3ds emulator. You can use a scraping tool like a flat screwdriver or something similar and lift the screen by putting it in between the metal and the rubber guard. Another way is to use a suction cup and pull the glass gently from above the HOME button. This removes the glass very smoothly.
The next move is to look for the flaps that hold the glass and the frame together. These flaps can be found out on the right side of the upper half. The flaps have orange stickers on them with numbers printed on them. You need to open these flaps using your wedging tool. Then there is a third clamp with a marking 3 on it. This thing is different from the other two. This black clamp needs to be released to get the whole thing open. Once this is done, the screen is free to be pulled out.
Step 3:
The next step is to remove all the screws from the panel. There are 6 screws in total. 5 screws are present on the sides, 3 on the side where the flaps are present and 2 on the other side. The last one is at the top right of the phone. During this phase of unscrewing the screws, you might be having problems with the tapes on them. This is not needed so you may also remove it.
Now remove the LCD screen from the metal framing. Do this with the help of the wedging tool. You must apply some pressure during this, but do not be afraid because the metal frame is very tough and would not get deformed.
Step 4:
The next step is to get the whole thing cleaned up. Since the frame is full of glass pieces, you must scrape off the broken pieces. Scraping is a good technique since it neatly gets the broken pieces off the reusable part without getting it distorted or tampered.
You may also use driers or heat guns to relax the previous paste that had been used to bind the parts of the phone. At this point, you must be very careful not to hurt yourself from the glass pieces.
Step 5:
Now take a hold of your new screen, build it accordingly. If you are applying double-sided tape, then you must be very careful to give it a proper cut. Now, apply some superglue or maybe some other adhesive to the screen and fit it into the frame. Be very careful not to apply the gum just near the HOME button. After this, wait for some time for the glue to get dried and the screen to get set.
Step 6:
Now you may again reassemble your phone. First, you need to put back the LCD and the screen together. There are two methods to slide the screen onto the LCD, but only one of them is the correct one. So, you would not have any difficulty in doing this. The best method to slide the LCD into the frame is to do it from the bottom. This also helps the clamp to slide on well.
Then place back the six screws in their desired positions. Click the black clamp in its place by holding the #1 and #2 cables. Do not panic if a little force is required to get them back to place. Then put back the screen and LCD onto the body of the phone and fit in the last two screws on the two sides of the USB.
So, now your phone is rebuilt and brand new again for you to show off!
Here Are Some Tips That You Could Follow During This Process
During this process, avoid using too much pressure while you are working with the LCD and the glass screen. This might cause damage because these materials are extremely delicate Mocospace. After unscrewing the screws, keep them very cautiously in a particular place. These screws are so small that you might lose them if you are careless.
Precautions and Warnings
If you are not confident, let professionals do it for you. You could easily get people from Apple to do the same for you. If you happen to damage the material even more, then the warranty becomes void.

